I have not blogged since August! Ugh! Between wedding plans and school I have had little time for anything else. That means no house projects, no craft projects, no new books, no new anything!
Our wedding is less than two weeks away on October 14th! After that, things should start to settle down a little and Joe and I will start some more projects around the house. Of course, recent news of Joe's deployment in February will have us busy with plans for that.
Keep an eye out over the next few weeks for pictures from the wedding! We will be posting those as soon as possible!
Also, on a side note...I would like to inform readers of the Walk to End Alzheimer's. Joe and I are walking in with this in Baltimore on October 29th. I am currently raising money for our team. If interested, donations can be made directly online at https://www.kintera.org/faf/search/searchTeamPart.asp?ievent=454886&lis=1&kntae454886=2F60CB286B08421887915DF607FA44A2&supId=335369845&team=4826361.
Well, until next time...happy blogging!
Monday, October 3, 2011

Friday, August 5, 2011
Guest Room Plans
Well I have been out of town for a little bit and haven't blogged and I am going through withdraw. How silly is that!?!
Our next big project (besides the kitchen chairs) is to work on the guest room in our basement. I am still out of town so I can't post pictures of what it looks like right now, but I think you will be excited. We have an extremely blank canvas to work with.
The room currently has a slab of concrete for flooring, exposed cinder block exterior walls, and studs showing themselves where interior walls should be.
The plan is to put carpet down (which is actually rolled up on the concrete right now) and put drywall up.
Then...decorate!!
So here are some of the things we will be decorating with
First a comforter from Bed Bath & Beyond. It is a Hayley Queen Comforter with fun green, purple, blue and magenta colors.

Here are some accent pillows we will use
Green

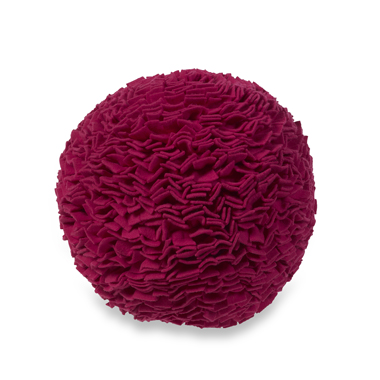
Magenta
Purple

And more Green

I want to paint the walls a combination of White and the Dark Purple...not quite sure if I plan on doing an accent wall or a pattern of some sort.
There is also this chair from Joss and Main that I love!! It is a Curves Hour Glass Chair shown below in Vintage Shitake - depending on what color walls are or what patterns we do, I will either go with this color or a Vintage Linen that they have.

The room does not have a closet in it which is great!! I love the idea of using an armoire!! Joe and I have started looking at a few used ones online and I like what we have seen. Obviously, we will have a refinishing session! Again, the color will depend on what is on the walls, or at least in that particular part of the room.
Here are a few that we are looking at...I am just posting pictures because they are from individuals and not companies.


When I get back home from North Carolina I will post more on the status of the guest room and we will start working on it! Can't wait!!!
Monday, July 25, 2011
Grout Schmout
Today I spread the grout over the tile.
Do you know what that means????
The next, and final step is to seal the grout and then I am done with this project!!!
Yes, I still have to stain the chairs but I will consider that a different project so just roll with me here
I only got pictures of the completed project because Joe was at work still so you'll just have to use your imagination on the actual process.

First I spread the Haystack colored grout

Then I wiped it off

Yes...that was it. Very simple and unexciting huh


I have also completed to dried flower/feather arrangements and one will go right in the center of this beautiful table. I will have pictures of that as soon as the grout is dried and sealed!
Sunday, July 24, 2011
Table Tiles!
This evening we started tiling!!! YAY!!
First, Joe removed the last bits from the old tile by chiseling away.

Then it was time to come up with a design...
We used porcelain tile from Home Depot called Montagna Belluna. The decorative pieces and square plain pieces are 6x6, the long rectangular pieces are approximately 3x12 and the smallest pieces are approximately 2x2.
I didn't have a design planned, so I just started placing tile to see what happened!


FINALLY! About 45 minutes to an hour later, I had our design complete!


The most frustrating part of the whole process was after the layout was complete. I had to take all the tile off the table so that we could lay the mortar.

Of course I had to lay them out on the floor in the right pattern so that we didn't forget the order...

Now time for the mortar...

Joe spread the mortar while I laid the tile back in place right behind him

SUCCESS!!
Here are some pictures of the finished product. OK, it's not finished. We still have to put the grout over the tile and then seal the grout but we have to wait 24-36 hours before our next step. So here are pictures of the almost finished product...


Tomorrow is another day full of more project work. Can't wait to share it with you!
Wednesday, July 20, 2011
Turnin Tables
Yesterday I started sanding and staining the kitchen table now that the center tiles have been removed.
I think it is coming along nicely...I really like the color


Needs to be a little darker...

I'm sure I was getting a little buzzed off the fumes...but I don't care...I was on a mission!


There it is...I like that color!

Now I just need to add the polyurethane layer and then start tiling the top. We had 5 tile samples for the top of the table...surprisingly we both picked the same one as our favorite!! You'll just have to wait and see what color it is!
Monday, July 18, 2011
Destruction!!!
This evening I got to be a one woman wrecking crew. If you need to let off some steam...I have the way to do it!
We began working on the table project tonight. All we got done was the removal of the tile top. It may not have been the correct way to remove tile but I really enjoyed myself!
But first, a reminder of what it started as...


My method of tile removal was simple...I took a hammer to it! I just banged away until it was done. Take a look


Clean up was not near as fun...but we did it


Now, some pictures from this weekend that I haven't posted yet...
I spray painted a piece of batten molding to go along the seam line between the color changes of the large chalkboard area

I also spray painted the existing plate covers and wall air return to be a brighter white. Some were white and some were beige but they all needed a little freshening.

Here is the completed and installed molding above the tall chalkboard

There is a Zombie magnet on the wall there

Joe and I also cut some molding for a frame around the smaller chalkboard...unfortunately we were off by just a touch and need to get another piece to complete the frame...but here is part of it!!


And here are just a few more pictures of the area as a whole. We were having some friends over on Sunday, so excuse the items on the table and countertops.
The center of the table here has a new beautiful vase that Joe's mom got us. I will have to get a close up of this later on.


Items left to complete...table obviously, flooring, countertop restoration and stenciling (instead of a mural - thanks to Michelle's inspiration from Dream Home DIY)
More to come tomorrow!
Subscribe to:
Posts (Atom)